
Hostwinds Tutorials
Search results for:
Table of Contents
Management of Shared Backups
This is a guide for shared hosting users who have ordered our backup service addon.
Verification of Backed-up Data
You're responsible for managing and verifying your backed-up data to ensure that the data stored is accurate and complete. If you believe there's an issue with your backed-up data, you may submit a support ticket to request further review of your backup policy.
After the first day of having the backup service addon, we request that you log in to your shared_backups object storage container and verify your data. And if you find any issues or discrepancies, please report them through a support ticket.
Requesting Restoration
Hostwinds technicians are capable of restoring content in full. This means that if you require Hostwinds support technicians to restore your backups, the process will overwrite all existing data with the backed-up copy.
This process involves the complete termination of your cPanel account and then the restoration of your full cPanel backup.
This will completely terminate the cPanel account and all content, emails, FTP accounts, files, and folders. They'll be recreated from the backup date you specify. If you have important emails, file changes, updates that you don't want to be lost since the restoration, this method is not recommended.
Accessing Backups
You have full access to your backups and are capable of manually restoring files/folders through FTP. Your backups are taken daily and are a FULL cPanel backup of your account(s).
We recommend using an S3 browser or similar (See more about this here). From there, you'll be able to download and extract your compressed backup(s). In the S3 browser, select the backup you wish to download and right-click. Then press Download:
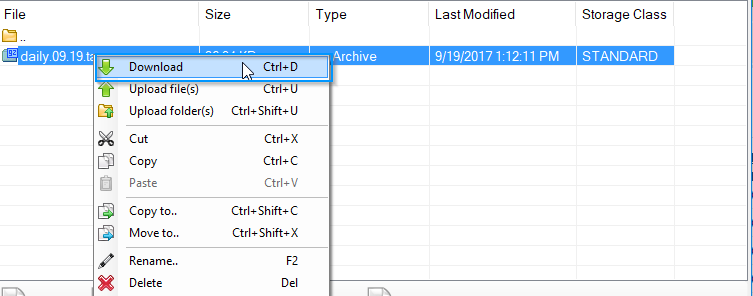
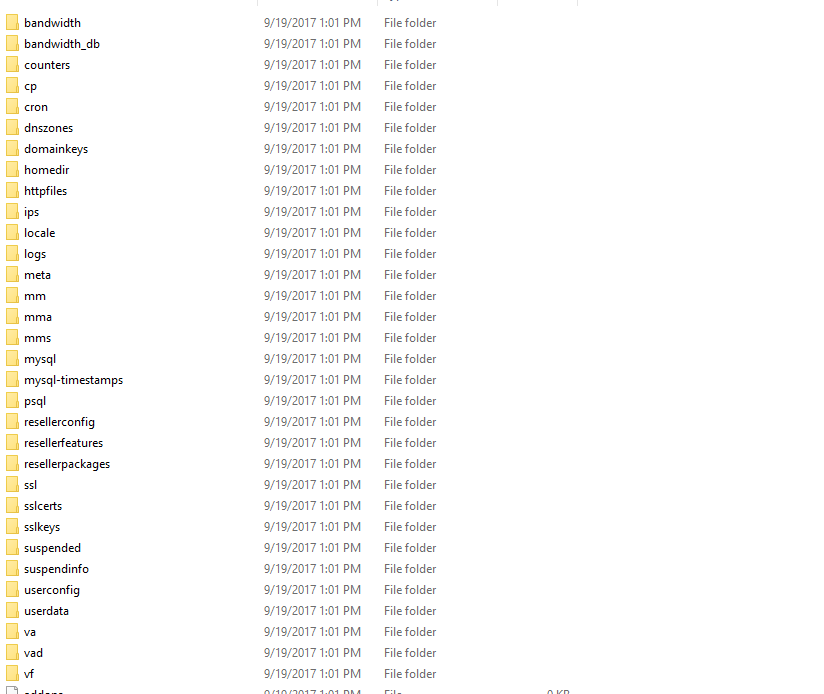
From there, you'll select the location locally on your PC where your backup will be stored. You'll then want to extract the backup contents with a tool such as Zip, WinRar, or 7-Zip. This extraction process will likely be required twice, to go from a .tar.gz to a .tar, then finally the folder itself. Your final folder will appear as follows:
Restoring Your Data
Your account's live data is under the folder homedir/public_html. Your account's MySQL databases will be located under the MySQL folder. From here, you can navigate and select the files you wish to restore. Log into your cPanel account's FTP and upload the files/folders to the desired paths.
Restoring MySQL Databases
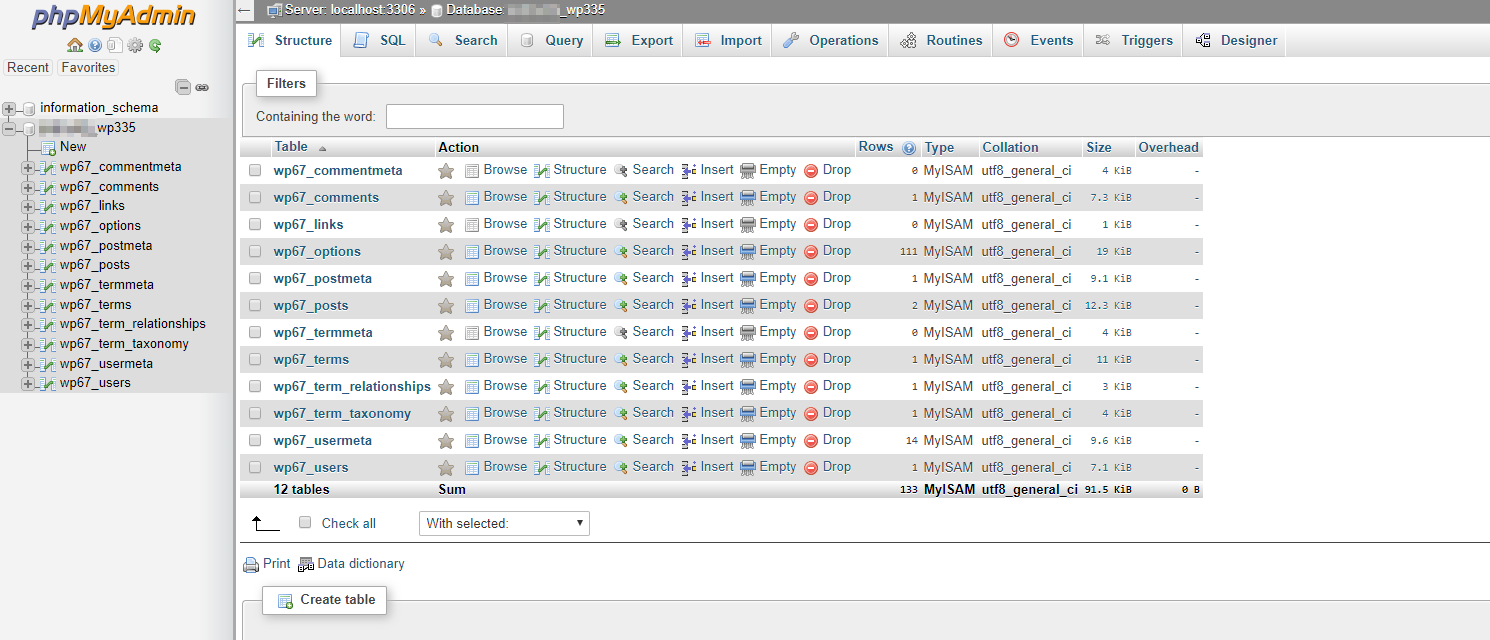
To restore MySQL, log in to your PHPMyAdmin from your cPanel account. This is an icon in cPanel that you can access directly to view and manage your account's databases. Select the database you wish to restore from the options on the left navigation panel:
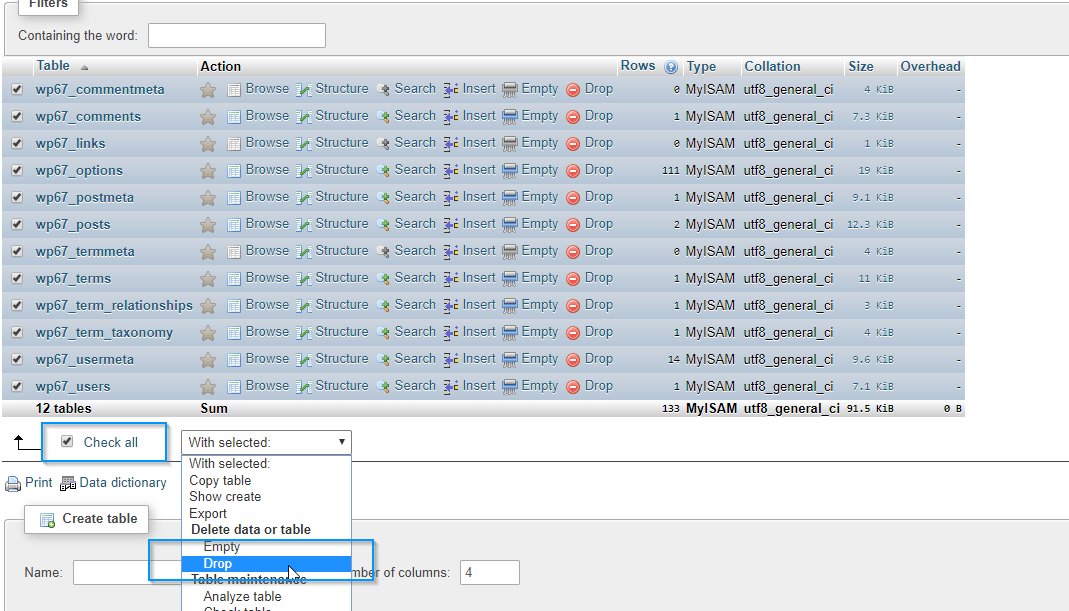
In this example, I'm completely dropping all content of this database by selecting the box Check All, then from the dropdown, selecting Drop:
You'll be taken to a confirmation page. Press yes. Next, select the Import tab:

Select Choose File.
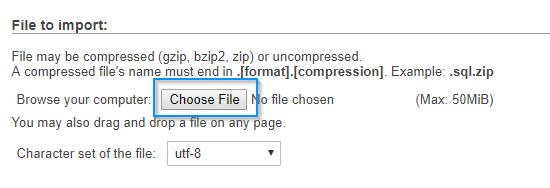
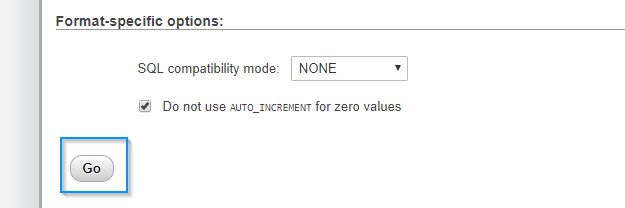
Then move your extracted backup data folder to the MySQL folder and select the .sql file for the database you wish to import/restore. Once selected, press Go:
You'll receive a confirmation message that the database has been imported:

Written by Michael Brower / September 22, 2017